October 24th-26th
✨Join us for a 3-day craft tour of some of the most magical European Christmas Markets✨
Cricut Adventure Packing Lists
Welcome to the Packing List! If you’re adventuring with us you might be wondering where to find the supplies that each Tour Guide recommends in their video workshop. To make it SUPER easy for you, we’ve put them together with links on this page.
Travel Essentials
- Your Cutting Machine
- Cutting Mats
- Desktop or Mobile Device
- Project Materials
- Adhesive
- Project Design or Template
- Scissors or Papercutter
- Weeding Tools
This page contains recommended products with affiliate links from our tour guides. They may make a small commission if you purchase through their link. Thank you for supporting our guides!
❄️ Packing Lists for Day One of the Adventure! ❄️
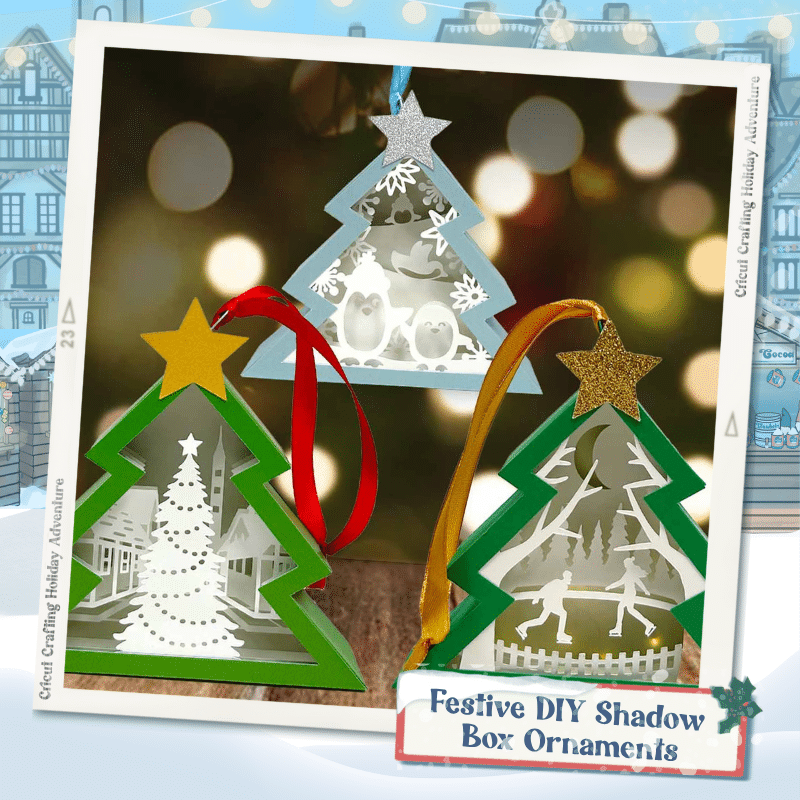
Jennifer's Packing List
Create glowing paper shadow box ornaments that combine layers, light, and festive charm! In this workshop, you’ll learn how to cut, assemble, and illuminate beautifully detailed 3D designs using your cutting machine and simple materials. With more than one ornament included, you’ll have options to craft and customize pieces perfect for decorating or giving as heartfelt handmade gifts.
This project can be made with the Cricut Joy Series, Explore Series, Maker Series, & Venture cutting machines.
Accordion Content
- Cutting Machine
- Fine Point Blade
- Standard Grip Mat
- Brayer
- Spatula
- Scraper
- Weeding Tool
- Tweezers (optional)
- Scissors
- Craft Glue (I used Bearly Art Precision Glue)
- Scoring Stylus (optional for files with score lines) -OR- Single Scoring Wheel (optional for files with score lines)
- Hot Glue Gun & Glue Sticks (optional for use with glitter cardstock)
- Silicone Finger Protectors (optional for use with hot glue)
- Two (2) Sheets of 8.5″ x 11″ Green Shimmer Cardstock (for outer tree structure) -OR-
- Two (2) Sheets of 8.5″ x 11″ Light Blue Shimmer Cardstock (for outer tree structure) -OR-
- Two (2) Sheets of 8.5″ x 11″ 65 lb. Colored Cardstock (for outer tree structure)
- One (1) Sheet of 8.5″ x 11″ Gold Shimmer Cardstock (optional for star decoration)
- One (1) Sheet of 12”x12” 65 lb White Cardstock (for inner layers)
- One (1) Set of 3.3′ LED Fairy Lights
- Approximately 15″ of Ribbon (optional for hanging)
- Medium 3/8″ Zots Glue Dots (for adhering fairy lights battery pack to back of lantern)
- One (1) Sheet of 12” x 12” Gold Glitter Cardstock (optional for star decoration) -OR-
- One (1) Sheet of 12” x 12” Silver Glitter Cardstock (optional for star decoration)
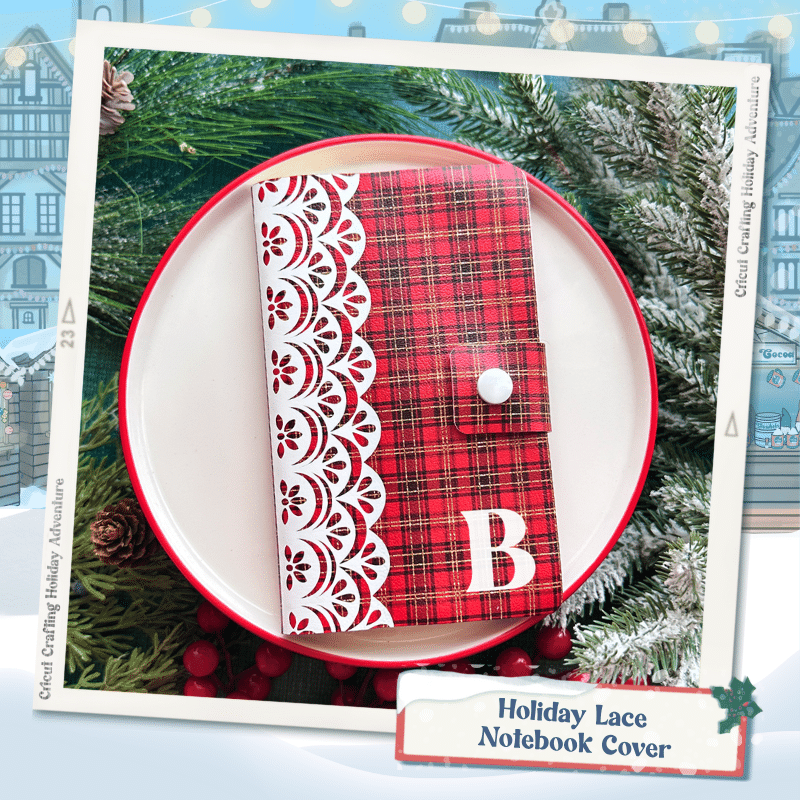
Amy's Packing List
Bring a touch of Strasbourg’s famous Alsace lace to your holiday crafting! In this workshop, you’ll learn how to create an elegant faux leather notebook cover with your Cricut, decorated with intricate lace-inspired cutouts. Add a personalized initial if you’d like for the perfect handmade gift or keepsake to capture the magic of the season.
This project can be made with the Cricut Joy Xtra, Explore Series, Maker Series, Venture, Silhouette, Juliet, and Romeo cutting machines.
Accordion Content
- Cutting Machine
- Purple Strong Grip Mat
- Green Standard Grip Mat
- Fine Point Blade
- Faux Leather of your choice, like a Holiday Plaid
- Or in green
- Heat transfer vinyl of your choice. I used Siser Easyweed in White
- Notebook Inserts, 3.5 x 5.5 inch size
- Size 20 Kam Snaps and Kam Snap Pliers
- Fabric Glue, I used Beacon Fabri-Tac
- EasyPress or EasyPress Mini
- Heat Pressing Pad
Cover Sheet like Teflon Sheet, Butcher or Parchment Paper - Weeding Tool

Jen's Packing List
Create a cozy European shopfront holiday card inspired by Strasbourg France! You’ll make the card, then see how to use Cricut’s Print Then Cut feature to make a coordinating sticker sheet to decorate the shopfront. This unique, interactive card is sure to wow!
This project can be made with the Cricut Joy Xtra, Explore Series, Maker Series, Venture, Silhouette, Juliet, and Romeo cutting machines.
- Cutting Machine (that does Print then Cut)
- LightGrip Mat
- Fine Point Blade
- Cricut Brayer
- Home Printer
- 1- Sheet Sticker Paper – Clear or Glossy White preferred. Clear or Glossy White
- 1 – Sheet Glossy Photo Cardstock (or Regular Cardstock)
- 2- Sheets Coordinating Cardstock
- 1- Sheet White Cardstock for Card Base
- Double-Sided Foam Strips or Dots (optional) or Double-Sided Adhesive Tape
- Envelope

Elena's Packing List
Learn to create an adorable mini Christmas market stall paper ornament that can be used with a photo or a message. The presentation covers all the steps in Cricut Design Space and the assembly. This project is inspired by the “lebkuchen” gingerbread ornaments sold in German, Austrian and other holiday markets.
This project can be made with the Cricut Joy Series, Explore Series, Maker Series, Venture, Silhouette, Juliet & Romeo cutting machines.
- Cricut machine
- Several Light Grip mats
- Cricut Fine Point Blade
- Cricut Brayer
- Spatula
- Fine point tweezers
- 65-pound (176 GSM) cardstock in:
– Green glitter cardstock - green cardstock
o White glitter cardstock –
o Plain white cardstock
o Medium brown cardstock
o Wood grain cardstock
• 100-pound+ (300+ GSM) cardstock in Dark Brown
• Precision tip glue (photo-safe recommended)
• Baker’s twine or ribbon
• Low-tack tape (painter’s tape or washi tape)
• Scissors
• Small clothespins or mini binder clips
• Photo
• Ballpoint pen

Regina's Packing List
Learn how to create stunning 3D Christmas ornaments inspired by Vienna, Austria’s golden filigree architecture. Using Gina’s custom SVG templates, you’ll discover how to cut, score, and assemble intricate ornament designs with your Cricut machine. By the end, you’ll have elegant handcrafted ornaments that can be gifted, mailed flat, or proudly displayed on your Christmas tree.
This project can be made with the Cricut Joy Series, Explore Series, Maker Series, Venture, Silhouette, Juliet & Romeo cutting machines.
- Cricut Maker or other Cricut machine that cuts cardstock
- Cricut Design Space software
- StandardGrip or LightGrip cutting mat (slightly used, not too sticky)
- Fine Point Blade
- Metallic gold cardstock (or cardstock of choice)
- Bearly Art precision craft glue (fine tip recommended)
- Scissors
- Cricut scraper
- Cricut tools: scoring stylus (or scoring wheel), spatula, weeding tool
- Straight edge or ruler
- Ornament wire hooks,
- clear string, twine, or ribbon
- Optional: Blue Painters Tape (holds down cardstock on mat)

Lucy's Packing List
Create a charming holiday keepsake with the Advent Village Calendar! This delightful project features seven unique gift box designs that you can mix, match, and decorate to build your own cozy Christmas village. Fill each of the 25 little house boxes with treats or tiny surprises to count down the days to Christmas. Inspired by the enchanting Christmas Museum in Salzburg, Austria, this project brings Old World holiday magic to your craft table—one glittery rooftop at a time.
This project can be made with the Cricut Joy Series, Explore Series, Maker Series, Venture, Silhouette, Juliet, and Romeo.
- Cutting Machine
- Fine Point Blade
- Standard Grip Mat
- Scoring stylus or scoring wheel
- Card stock in various colors
- Glue – I use Bearly Art Glue
- Velcro dots 3/8 in (.95 cm)
- Way to display houses – I used a 18 x 24 inch canvas
- Snow Tex for adding snow – optional
❄️ Packing Lists for Day Two of the Adventure! ❄️

Sarah's Packing List
Decorate your Christmas tree with these adorable gnome decorations. Layered up cardstock to build the gnomes, and personalized them with your choice of patterned paper for their hats.
This project can be made with the Cricut Joy Series, Explore Series, Maker Series, Venture, Silhouette, Juliet & Romeo cutting machines.
Accordion Content
- Cutting machine
- Light grip cutting mat
- Fine point blade
- Cardstock in various colours
- Patterned paper
- Ribbon
- Glue (I like Bearly Art Glue and Collall)
- Foam pads (optional)

12x12 Cardstock Shop's Packing List
Deck your halls with handmade cheer this year! In this class, we will be making a Scandinavian-inspired Christmas banner using all the beautiful specialty papers at the 12×12 Cardstock Shop. Learn how to hang your banners so they appear to float and see just how easy it is to use this same banner “recipe” to customize for any occasion.
This project can be made with the Cricut Joy Xtra, Explore Series, Maker Series, Venture, Silhouette, Juliet & Romeo cutting machines.
- Cutting Machine
- Cricut Standard Grip Mat
- FIne Point Blade
- 2 –12×12 Sheets White Cardstock – Encore Snowy White
- ½- 12×12 Sheet Mint Green Cardstock – Encore Bayou
- 1- 12×12 Sheet Black Cardstock – Encore Black Woodgrain
- 1- 12×12 Sheet Gold Foil Cardstock – Encore Antique Diamonds Gold
- ½- 12×12 Sheet Dark Green Cardstock – Hunter Green Metallic Speckles
- ½- 12×12 Sheet Red Cardstock – Encore All American Red
- 1- 12×12 Sheet Red Glitter Cardstock – Glitter Luxe Christmas Red and/or WOW Metallic Red Fine Glitter
Scrap of Yellow Cardstock - 6 Feet Ribbon or Twine
- Dimensional Foam Adhesive

Erin's Packing List
Create fast and easy cutie Nisse gnome cards, perfect for mailing home for the holidays!
This project can be made with the Cricut Joy Series, Explore Series, Maker Series, Venture, Silhouette, Juliet, and Romeo.
- Cutting machine
- Fine point blade
- Light Grip Mat
- Erin Reed Makes Nisse Gnome Stamp Card Kit
- White Cardstock
- Red Cardstock
- Paper Trimmer
- Printer
- Adhesive

Michelle's Packing List
Learn how to use your pen tool to create this adorable Gingerbread Easel Card. Deck your holiday halls or send out holiday greetings with Cricut projects, but let the cutting machine do all the work.
This project can be made with the Cricut Joy Xtra, Explore Series, Maker Series, Venture, Silhouette, Juliet & Romeo cutting machines.
- Cutting Machine
- Standard Grip Mat
- Fine Point Blade
- 3 sheets 12×12 Brown Cardstock
- 1/2 sheet 12×12 Red Cardstock
- 1/2 sheet 12×12 white cardstock
- White Cricut compatible pen
- White ink (optional)
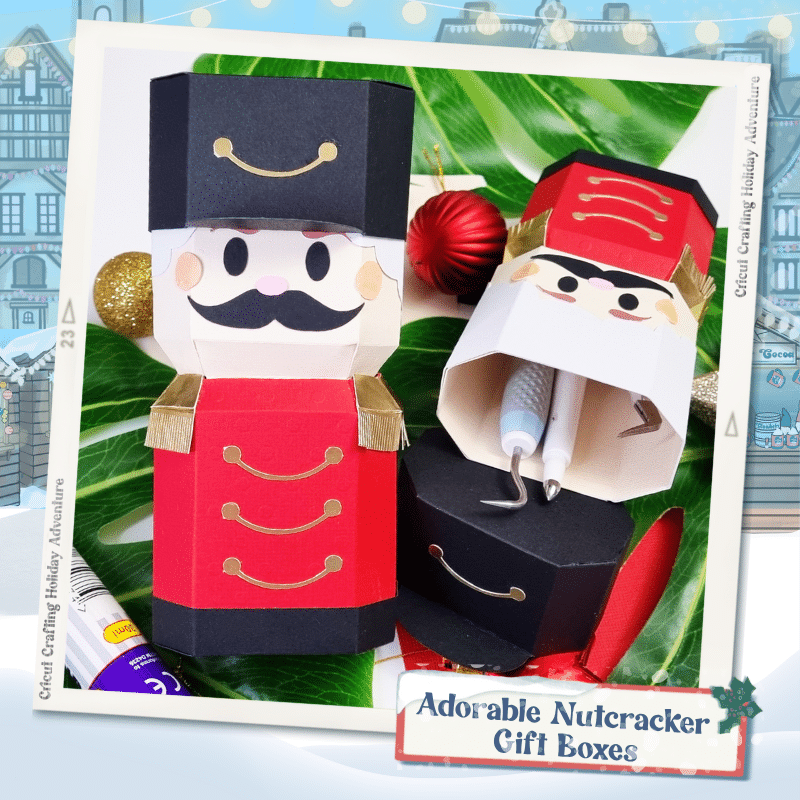
Kelly's Packing List
Create a stunning Nutcracker gift box with your Cricut – perfect for holiday gifting and festive décor! In this step-by-step workshop, Kelly Rossouw walks you through resizing, cutting, and assembling your project with pro tips for scoring, gluing, and adding finishing touches. Whether you’re a Cricut beginner or a seasoned maker, this fun craft is a must-try for the season!
This project can be made with the Cricut Joy Series, Explore Series, Maker Series, Venture, Silhouette, Juliet & Romeo cutting machines.
DummyAccordion Content
- Cricut machine: Maker/Explore/ Joy / Joy Xtra (project works on any)
- Cutting mat: LightGrip preferred; StandardGrip only if it’s not super sticky
- Cardstock: black, white, red, skin tone of choice
- Small piece of gold foil (for hat/jacket accents)
Scoring tool: Scoring Stylus or Scoring Wheel (Maker) - Foil Transfer Tool (workaround for Joy/Joy Xtra scoring)
- Strong, quick-dry embellishment glue
- Brayer and general craft tools (scraper, etc.)
- Weeding tool (for pressing interior tabs)
- Reverse tweezers (to place tiny gold pieces)
- Acrylic paint pens (for eyes, cheeks, nose, brows)
Optional: alcohol swab (to clean paint from the mat if needed)

Jen's Packing List
Bring a bit of German Christmas market charm to your home with this merry handmade felt wreath project! Using Cricut-cut felt pine boughs and holly, you’ll create a. mini layered wreath that’s no-sew, festive decor, package tie-on’s, or ornaments.
This project can be made with the Cricut Explore Series, Maker Series, Venture, Silhouette, Juliet, and Romeo cutting machines.
- Cutting Machine
- Rotary Blade for Maker for other machines follow recommendations
- Fabric Mat
- Blue Painters Tape
- Cricut Brayer
- Green Felt – for use with Maker machines
- Red Wool Balls Medium
- Red Wool Balls Small
- White Wool Balls
- 18-gauge Floral Wire
- Brown Floral Tape
- Wire Garland or Metal Wreath Frame
- Beacon’s Fabric Glue or Hot Glue Gun with Glue
- Ribbon

Amy's Packing List
Step into the magic of Nuremberg’s famous Christmas Market, known worldwide for its handcrafted Nutcrackers and festive treats. In this workshop, you’ll make a whimsical gingerbread house gift card holder from faux leather and heat transfer vinyl. With a handy slot on the back for tucking in a gift card, it’s the perfect way to pair holiday tradition with a handmade touch.
This project can be made with the Cricut Joy Xtra, Explore Series, Maker Series, Venture, Silhouette, Juliet, and Romeo cutting machines.
Accordion Content
- Cutting Machine
- Fine Point Blade
- Purple Strong Grip Mat
- Green Standard Grip Mat
- Faux Leather of your choice. I used a solid Brown.
- Heat transfer vinyl of your choice. I used Siser Easyweed in White, Red and Green.
- Fabric Glue, I used Beacon Fabri-Tac
- EasyPress or EasyPress Mini
- Heat Pressing Pad
- Cover Sheet like Teflon Sheet, Butcher or Parchment Paper
- Weeding Tool
❄️ Packing Lists for Day Three of the Adventure! ❄️

Amy's Packing List
Add a sprinkle of Scandinavian folklore to your holiday crafting with these personalized stocking tags inspired by the Stockholm Christmas Market. In Nordic tradition, the Tomte gnome is a beloved holiday guardian who brings good luck to the home. Paired with a festive tree design, these faux leather tags can be customized with any name, making them a meaningful keepsake for every stocking on your mantle.
This project can be made with the Cricut Joy Series, Explore Series, Maker Series, Venture, Silhouette, Juliet, and Romeo cutting machines.
- Cutting machine
- Purple Strong Grip Mat
- Green Standard Grip Mat
- Fine Point Blade
- Faux Leather of your choice. I used White and Dark Green solids.
- Heat transfer vinyl of your choice. I used Siser Easyweed in Light Blue, Charcoal Grey, White Mint, and Light Apricot. I also used Siser Glitter HTV in Red and Black Silver
- Fabric Glue, I used Beacon Fabri-Tac
- ⅛ inch ribbon
- EasyPress or EasyPress Mini
- Heat Pressing Pad
Cover Sheet like Teflon Sheet, Butcher or Parchment Paper - Weeding Tool

Mim's Packing List
Make super fun Christmas-themed Gnome stickers to decorate or organize your gifts, cards, and more! Mim Jenkinson, sticker-making expert, will talk you through the steps to design, print, and cut these cute stickers in Cricut Design Space the fast and fun way.
This project can be made with the Cricut Joy Xtra, Explore Series, Maker Series, & Venture cutting machines.
- Cutting Machine
- Fine Point Blade
- Light Grip Mat
- Brayer (optional)
- Clip Art

Debbie's Packing List
Learn to make a traditional Swedish Dala Horse Ornament. This beautiful layered paper craft is sure to be a lovely addition to your holiday decor on the tree or as a gift tag.
This project can be made with the Cricut Joy Xtra, Explore Series, Maker Series, Venture, & Silhouette cutting machines.

Amy's Packing List
Celebrate the vibrant spirit of Kraków’s Christmas Market with this jewelry or trinket tray inspired by traditional Polish folk art. Using faux leather and heat transfer vinyl, you’ll create a colorful, patterned tray that’s both practical and beautiful. It’s a handmade piece that adds old-world charm to your holiday décor.
This project can be made with the Cricut Joy Xtra, Explore Series, Maker Series, Venture, Silhouette, Juliet, and Romeo cutting machines.
- Cutting Machine
- Purple Strong Grip Mat
- Green Standard Grip Mat
- Fine Point Blade
- Faux Leather of your choice. I used an assortment of solid colors – Red, Mint Chip, California Breeze, and Berry Blue
- Heat transfer vinyl of your choice. I used Siser Easyweed White, Mint, Pale Blue, Cadette Green
- 6mm x 6mm Rivets, or 8mm Rivets and a hammer or Size 20 Kam Snaps with Kam Snap Pliers
- EasyPress is best, or EasyPress Mini
- Heat Pressing Pad
- Cover Sheet like Teflon Sheet, Butcher or Parchment Paper
- Weeding Tool

Jen's Packing List
Craft elegant air-dry clay gift tags inspired by the folk-art designs of Poland. You’ll use Cricut-cut stencils and shimmering gold leaf to create timeless tags featuring Polish stars and knit motifs. Perfect as ornaments or package tie-ons, these handmade keepsakes pair beautifully with mason jar gifts and cozy market-inspired treats.
This project can be made with the Cricut Joy Series, Explore Series, Maker Series, Venture, Silhouette, Juliet, and Romeo.
- Cutting Machine
- Fine Point Blade
- StandardGrip Mat
- Painters Tape
- Mylar or Transparency Sheets
- Crayola Air Dry Clay
- Parchment Paper or Wax Paper (optional)
- Rolling Pin w/ Table Cover
- Tag Cookie Cutters
- Needle Tool for Clay
- Gold Leaf Kit (optional)
Thin Ribbon or Twine/String

Tracy's Packing List
Learn how to create two Polish folk art-inspired ornaments using layered cardstock. I’ll show you how to upload and set up the free SVG files in Cricut Design Space, then walk you step by step through cutting, layering, and assembling both designs. These designs are quick to assemble, fun to customize with color choices, and will add a handmade touch to your holiday decor..
This project can be made with the Cricut Joy Xtra, Explore Series, Maker Series, & Venture cutting machines.

Don't forget to check out our other "travel planning pages" for more information that will make your Cricut Adventure AMAZING!
Want ongoing access, premium bonuses and more?
Get your ULTIMATE Packing List “MUST HAVE”… the VIP Pass!!!